 It's Evan again.
 I really like ribs. However, I had a dilemma: restaurants usually don't do them quite right and I don't own a smoker like my dad does. What to do? Turn your Webber kettle grill into a smoker!
You need: pork ribs. smoke. bbq sauce. hunger. 5 to 6 hours.
But really, you'll also need two aluminum foil trays, a regular source of water, and at least half a bag of charwood (not charcoal, it is too ashy)

 Okay, first you need to trim your ribs. On the back side there is a membrane you need to cut off. It is tricky but if you don't get at least most of it, it can make the ribs very chewy. Make an incision with your boning knife and shove your fingers in there, as pictured. It'll rip off eventually.
 Next trim the floppy meat side that isn't connected to any bone. This is what will make it a sort-of St. Louis cut. Plus, when I defrosted this set of ribs, as you can see, this part cooked a little. So it had to be removed.

 The finished trimmed product. There are a few other floppy parts or fatty portions that are good to remove. If you don't feel like it, I don't think it's a game changer. After all, it's still meat. And meat is good.
 Sprinkle on your rub. Then rub in your rub. You can see that we didn't have a pan large enough for these ribs.
 After rubbing, put them in the fridge. I did so overnight, covered with aluminum foil. I didn't take a picture of them wrapped in aluminum foil because that would be boring.
 The next day, let them reach room temperature before smoking them. While you're doing that, start your fire.
 I use a chimney starter because it doesn't stink like lighter fluid and because I really don't want the charwood to absorb all those chemicals. The ribs aren't being grilled, they're being smoked; toxic smoke doesn't sound good.

 Once it has sat smoldering for 3-5 minutes, I'll dump it.
  Okay, now the smoker set up must be explained. Basically, put one aluminum foil tray on the charcoal rack, piling the charwood up about 5 inches on the opposing side. Put a layer of non-lit charwood down, then dump the burning stuff on top of it. This tray will be the drip tray and the meat with go on top of it. Next put the cooking rack on and put a tray directly over the fire. This will hold the water that will keep the fire from being too hot and produce more smoke. The meat does NOT go directly over the burning wood.

 Fill the tray with water. Your neighbors will surely think you're crazy when you spend 10 minutes starting your grill at 9am then start spraying your garden hose into it.
 Do you like how the grass won't grow in the crappy Colorado sand? But how it'll grow on the patio? I want a giant "I am renting this house" sign. Despite that, it still all looks 100% better than it did when I moved in.

 Again, the meat is not directly over the fire. Indirect cooking and smoke will be the order of the day.
 Smoke one side for 1.5 hours. Then flip it over and smoke the other for 1.5 hours. Check every 45 minutes or so to make sure a) the fire is still on and b) that the water hasn't completely evaporated. It'll need refilled with water every hour or so.


 Okay, now they need bbq-sauced. If you like them dry, don't do this part, but make sure the last hour has regular water bottle squirting instead. I like Curley's bbq sauce for this. Brush a thin layer of sauce on one side every fifteen minutes, flipping when you do so. This will make the sauce sticky and char the first layer, which VA likes.
 They're not burned. The darkness is the sauce charring a bit. If you don't like that, don't sauce them so often and so early. They would be fine dry with a sauce put on once they're removed from the grill, if you prefer.
 And that's it. It's a very flexible thing to make. And delicious, too. Once you figure these out, you won't be able to order them at most restaurants because they'll be too chewy, too broiled, or have the consistency of having been microwaved.
And that's about it. There's really not much of a recipe going on here. It's mostly meat and fire, which is a wonderful thing.
First things first, I make a dry rub to put on the ribs. I don't measure or have any real rhyme or reason to it (which is why none of these ingredients are in the above list). Just mix until you like the smell, taste, or color. I enjoy randomly combining things to make rubs, sauces, and chili, and since I am making it up as I go, it's never the same twice. Oh well.
This is a mixture of lots of ground black pepper, lots of paprika (Hungarian and smoked--I love paprika), celery salt and onion powder, a bit of cayenne pepper, an incredibly small amount of cinnamon, and some kosher salt. Go easy on the kosher salt. I put too much in this time and they were a bit too salty. However, if you're even more careless with it, you'll have salted jerky and not smoked ribs.
I like baby back ribs, and St. Louis style baby back ribs are even better because they come with the extra stuff cut off already. But you can more or less do it yourself.

 Next trim the floppy meat side that isn't connected to any bone. This is what will make it a sort-of St. Louis cut. Plus, when I defrosted this set of ribs, as you can see, this part cooked a little. So it had to be removed.
 The finished trimmed product. There are a few other floppy parts or fatty portions that are good to remove. If you don't feel like it, I don't think it's a game changer. After all, it's still meat. And meat is good.
 Sprinkle on your rub. Then rub in your rub. You can see that we didn't have a pan large enough for these ribs.
 After rubbing, put them in the fridge. I did so overnight, covered with aluminum foil. I didn't take a picture of them wrapped in aluminum foil because that would be boring.
 The next day, let them reach room temperature before smoking them. While you're doing that, start your fire.
 I use a chimney starter because it doesn't stink like lighter fluid and because I really don't want the charwood to absorb all those chemicals. The ribs aren't being grilled, they're being smoked; toxic smoke doesn't sound good.
Apparently the chimney starter is an odd thing to use from the looks I get from people. So I'll briefly say how to do it. Fill it with charwood on the top. I mix in old, not-quite-burned-up charwood from the last time, too. I'm efficient and cheap. Then rip up a sheet of newspaper into strips. Put it under the charwood and light it on fire. Repeat until the newspaper self-ignites from the heat. This takes anywhere from 3 sheets to 8 or so depending on how much ink is on the paper and the quality of the newspaper.

 Once it has sat smoldering for 3-5 minutes, I'll dump it.
  Okay, now the smoker set up must be explained. Basically, put one aluminum foil tray on the charcoal rack, piling the charwood up about 5 inches on the opposing side. Put a layer of non-lit charwood down, then dump the burning stuff on top of it. This tray will be the drip tray and the meat with go on top of it. Next put the cooking rack on and put a tray directly over the fire. This will hold the water that will keep the fire from being too hot and produce more smoke. The meat does NOT go directly over the burning wood.
 Fill the tray with water. Your neighbors will surely think you're crazy when you spend 10 minutes starting your grill at 9am then start spraying your garden hose into it.
  Do you like how the grass won't grow in the crappy Colorado sand? But how it'll grow on the patio? I want a giant "I am renting this house" sign. Despite that, it still all looks 100% better than it did when I moved in.
 Again, the meat is not directly over the fire. Indirect cooking and smoke will be the order of the day.
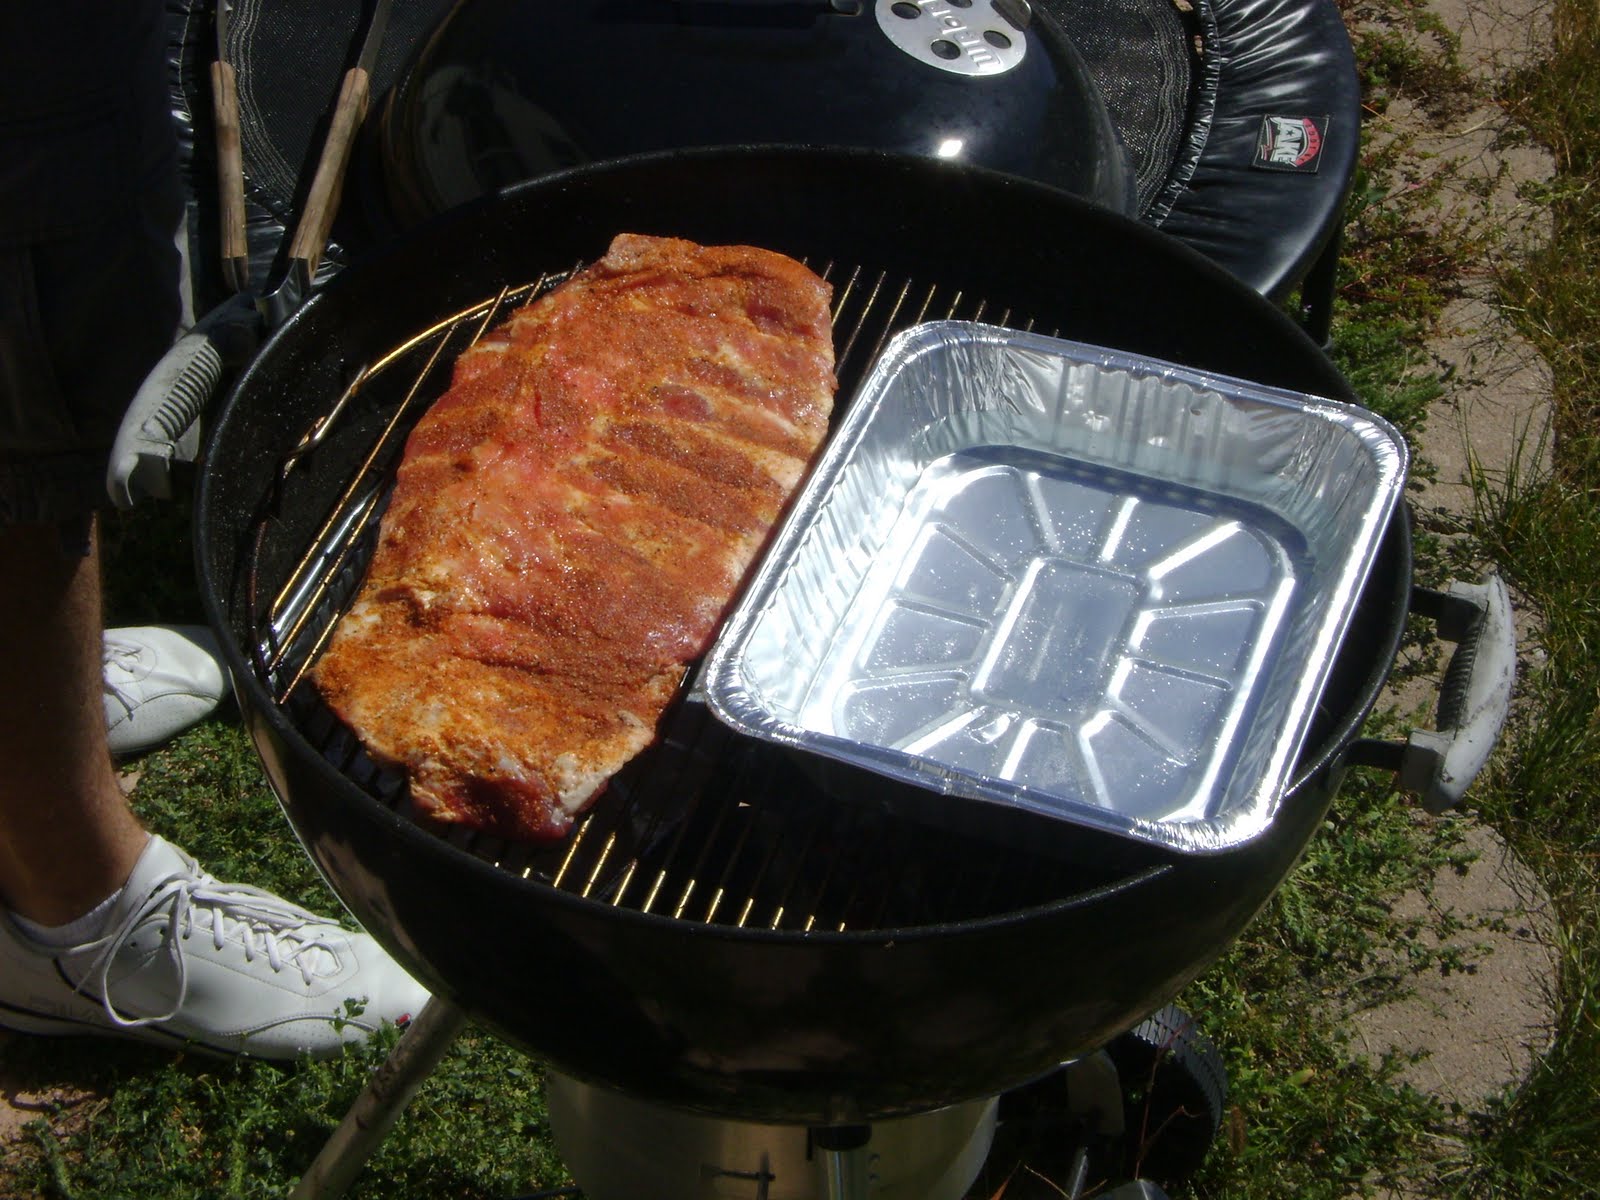 Smoke one side for 1.5 hours. Then flip it over and smoke the other for 1.5 hours. Check every 45 minutes or so to make sure a) the fire is still on and b) that the water hasn't completely evaporated. It'll need refilled with water every hour or so.
Then wrap them in aluminum foil and smoke covered for a hour. I forgot to take a picture of this, but it should be fairly self evident. The charwood will likely need to be replenished at this point.

 Okay, now they need bbq-sauced. If you like them dry, don't do this part, but make sure the last hour has regular water bottle squirting instead. I like Curley's bbq sauce for this. Brush a thin layer of sauce on one side every fifteen minutes, flipping when you do so. This will make the sauce sticky and char the first layer, which VA likes.
Then they're done. They should be rather hard to flip at this point because they're falling off the bone. This time around, it was 90 degrees, about 10% humidity and oppressively sunny outside when I did these, so they were a bit dryer than when I did them on a comparatively damp spring day or on my birthday in Illinois' July humidity. To compensate, I should've had more aluminum foil time and less non-covered time. But otherwise, they were very good.
These are my favorite things to make!
 They're not burned. The darkness is the sauce charring a bit. If you don't like that, don't sauce them so often and so early. They would be fine dry with a sauce put on once they're removed from the grill, if you prefer.
 And that's it. It's a very flexible thing to make. And delicious, too. Once you figure these out, you won't be able to order them at most restaurants because they'll be too chewy, too broiled, or have the consistency of having been microwaved.
No comments:
Post a Comment